How to Do Clean and Jerk
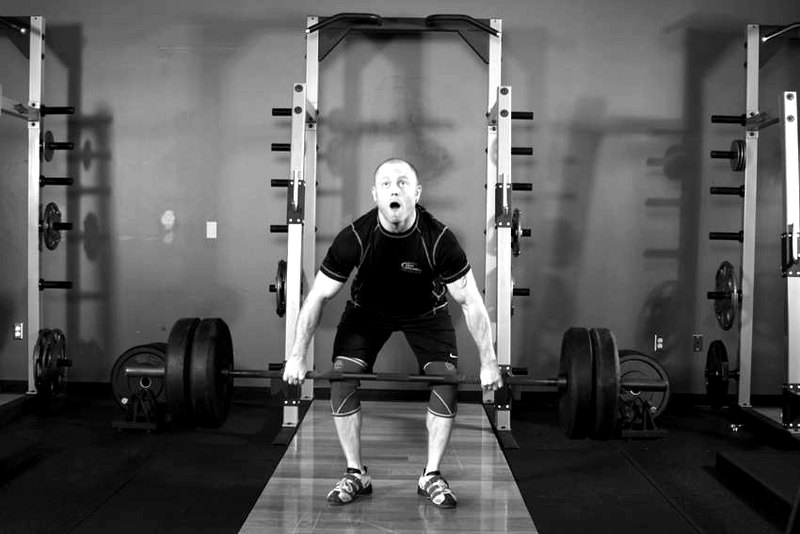
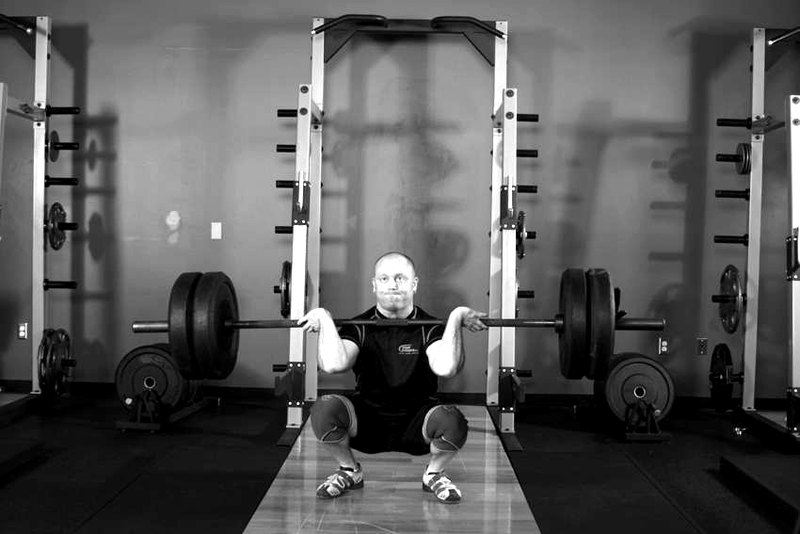
Start and end of one clean rep of Clean and Jerk.
Quick facts
| Primary muscle | Shoulders |
|---|---|
| Secondary muscles | Core, Glutes, Hamstrings, Quads, Back, Triceps |
| Equipment | Barbell |
| Category | Olympic weightlifting |
How to perform Clean and Jerk
- With a barbell on the floor close to the shins, take an overhand or hook grip just outside the legs. Lower your hips with the weight focused on the heels, back straight, head facing forward, chest up, with your shoulders just in front of the bar. This will be your starting position.
- Begin the first pull by driving through the heels, extending your knees. Your back angle should stay the same, and your arms should remain straight. Move the weight with control as you continue to above the knees.
- Next comes the second pull, the main source of acceleration for the clean. As the bar approaches the mid-thigh position, begin extending through the hips. In a jumping motion, accelerate by extending the hips, knees, and ankles, using speed to move the bar upward. There should be no need to actively pull through the arms to accelerate the weight; at the end of the second pull, the body should be fully extended, leaning slightly back, with the arms still extended.
- As full extension is achieved, transition into the third pull by aggressively shrugging and flexing the arms with the elbows up and out. At peak extension, aggressively pull yourself down, rotating your elbows under the bar as you do so. Receive the bar in a front squat position, the depth of which is dependent upon the height of the bar at the end of the third pull. The bar should be racked onto the protracted shoulders, lightly touching the throat with the hands relaxed. Continue to descend to the bottom squat position, which will help in the recovery.
- Immediately recover by driving through the heels, keeping the torso upright and elbows up. Continue until you have risen to a standing position.
- The second phase is the jerk, which raises the weight overhead. Standing with the weight racked on the front of the shoulders, begin with the dip. With your feet directly under your hips, flex the knees without moving the hips backward. Go down only slightly, and reverse direction as powerfully as possible.
- Drive through the heels create as much speed and force as possible, and be sure to move your head out of the way as the bar leaves the shoulders.
- At this moment as the feet leave the floor, the feet must be placed into the receiving position as quickly as possible. In the brief moment the feet are not actively driving against the platform, the athletes effort to push the bar up will drive them down. The feet should be split, with one foot forward, and one foot back. Receive the bar with the arms locked out overhead. Return to a standing position.
Muscles worked
- Shoulders (primary): raises and rotates the arms and drives everything overhead.
- Core (secondary): braces the trunk and resists twisting to protect the spine.
- Glutes (secondary): extends and stabilises the hip — the engine behind hinges, squats and sprints.
- Hamstrings (secondary): bends the knee and extends the hip through hinges and pulls.
- Quads (secondary): extends the knee to drive squats, lunges and jumps.
- Back (secondary): pulls the arms down and toward the torso and keeps the spine stable.
- Triceps (secondary): straightens the elbow to lock out every press and pushdown.
Sets & reps by goal
| Goal | Sets × reps | Load | Rest |
|---|---|---|---|
| Strength | 3–5 × 3–5 | Heavy (~85%+) | 2–3 min |
| Hypertrophy | 3–4 × 8–12 | Moderate (~65–75%) | 60–90 s |
| Endurance | 2–3 × 15–20 | Lighter (~50–60%) | 30–45 s |
Pick the row that matches your goal. If you're newer, anchor in the hypertrophy range while you groove the form.
Form tips
- Keep the ribs down and the glutes tight so the lower back doesn't arch to 'help' the weight up.
- Keep the bar path close and stacked over your mid-foot; letting it drift forward wastes force and loads the lower back.
- Prioritise speed and position over load — a fast, well-timed pull beats a heavier sloppy one.
- Breathe out on the effort and in on the return, keeping one steady rhythm across the set.
Common mistakes
- Pressing with the lower back arched instead of a braced, stacked torso.
- Loading the bar heavier than your form allows and turning strict reps into a whole-body heave.
- Muscling the bar up slowly instead of moving fast underneath it.
Frequently asked questions
What muscles does Clean and Jerk work?
Clean and Jerk mainly works the shoulders, with the core, glutes, hamstrings, quads, back, triceps helping as secondary movers.
What equipment do I need for Clean and Jerk?
Clean and Jerk needs a barbell and plates (plus a rack or bench where the movement calls for one).
How many sets and reps should I do for Clean and Jerk?
It depends on your goal: about 3–5 sets of 3–5 heavy reps for strength, 3–4 sets of 8–12 for muscle growth, or 2–3 sets of 15–20 for endurance. Pick the row that matches your goal. If you're newer, anchor in the hypertrophy range while you groove the form.
Train Clean and Jerk with a coach in your pocket
Gimmy is your AI gym buddy — it programs Clean and Jerk into recovery-aware workouts, tracks your sets, and shows one score that tells you if it's working.
Get early access